Caden peterson
All Projects
Don't want to see anything specific? See all of my work? Start here!


Contact / About
Get in contact / Get to know me
Production Portfolio
GRIMWAR
A Fast Paced Mobility Shooter made in a team of 12 over the course of 36 weeks

ASquare Games and Simulation
Performed production work under NDA.
Developed and executed development pipelines, stand ups, and living documentation for real-time systems in both games and simulation
Stone Soldiers
Documentation written as an exercise for an upcoming title, given a hypothetical span of time to create, plan, and budget for tasks
Stone Soldiers - Production

Stone Soldiers was an exercise in planning a full-length title for development over 10 weeks. The documentation was created over the course of 1 week.Stipulations
I was given a list of team members, and had to create and ration tasks over a 10 week period to be later shared with stakeholders. I was also given a GDD from which to pull the tasks.Production of Deliverables
Though the final goal was to create a single Jira gantt & backlog with all of the tasks listed, I took it upon myself to also create other living documentation to assist with the creation of the Jira gantt & backlog.Of them, I employed the use of a Product Backlog, Risk Assessment Chart, and a revision of the GDD given to me. You can find them below.
3D art portfolio
Cat Skull
Winner of the July Art for Games Art Competition - Focusing on Shader development and fast-paced 3D art skills
GRIMWAR
A Fast Paced Mobility Shooter made in a team of 12 over the course of 36 weeks


SUNSHOT
My Take on the Exotic Handcannon from Destiny
Enoch
A 3D take on Enoch from Over the Garden Wall

Composition / SFX Portfolio
GRIMWAR
A Fast Paced Mobility Shooter made in a team of 12 over the course of 36 weeks

Game Design
D&D Class: Astrologian
A full-caster that controls and manipulates the cosmos utilizing star-fragments and ingenuity for Dungeons and Dragons 5th Edition


D&D Class: Blood Hunter
A twisted martial class built around using Hit Points as a resource, twisting and contorting the user's form to exert will
Map: The Continent Of Sera
Civilization built upon a megacontinent, a song is sang to make all forget the landmass's strange past

All Projects
3D Art: Cat Skull
Winner of the July 2025 Art For Games Art Competition - A focus and exploration into unity shader graph
Game: GRIMWAR
A Fast Paced Mobility Shooter made in a team of 12 over the course of 36 weeks

3D ARt: Sunshot
My Take on the Exotic Handcannon from Destiny

3D ARt: Enoch
A 3D take on Enoch from Over the Garden Wall

Projects - Sunshot
Personal Project
2023
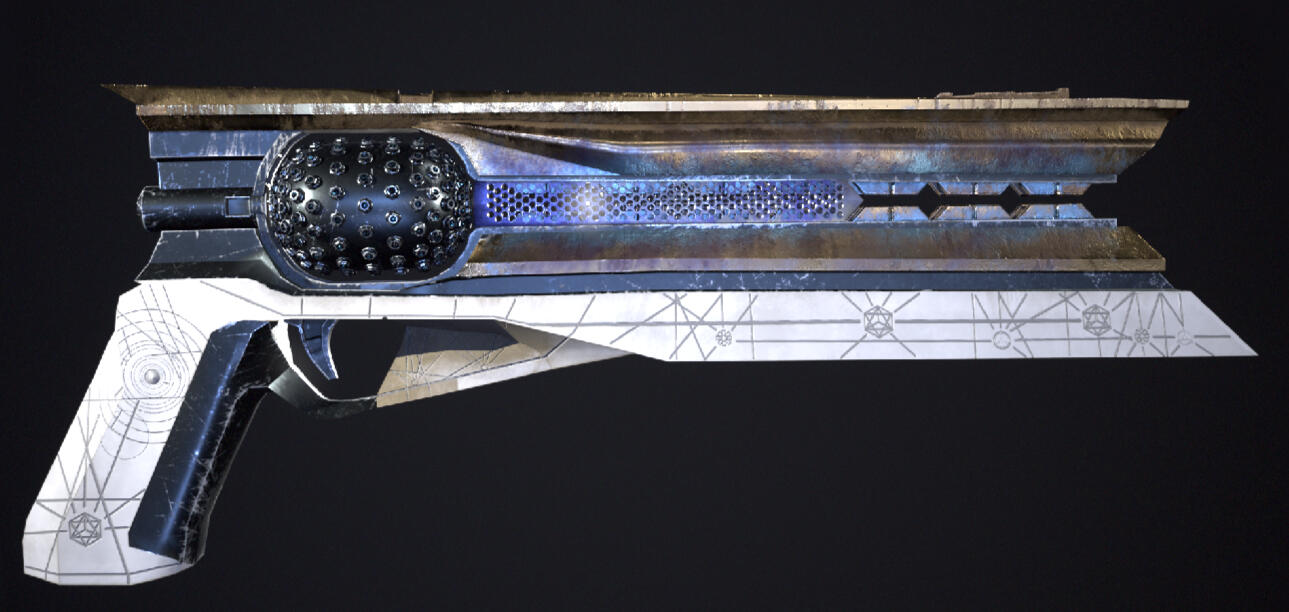
A recreation of the burning-bright exotic handcannon from Destiny 2
Modeled, retopologized and UV'd in Blender, textured in Substance Painter, and rendered in Blender.The Sunshot is a passion-project that was created in celebration of the release of Destiny 2's final expansion "The Final Shape". (It has nothing to do with the expansion, I just love the design of the exotic).I mainly looked at the process as an exercise of creating a game-ready hero-asset, and looking into creating believable textures for an otherwise unbelievable weapon.

The Sunshot is a great example of organic and inorganic shapes coming together to form something that feels alien - yet still familiar. here are a few examples of the different views players would get at it during play.


UVing the Sunshot wasn't terribly difficult this time around, but through a few different iterations I eventually found something that I liked a little better. I ran into issues with the heat sinks on the cylinder of the Sunshot (which I'll get more into in the next entry) but it's safe to say that that aspect, as well as the riveting on the actual barrel, just after the cylinder also caused quite a few issues due to the use of booleans, and no real good way to find decent topology during the retopo process.

Here's a closer look at the areas that gave me the most problem.The heat sinks on the cylinder of the Sunshot were achieved with Geometry Nodes in Blender. Just an easy dispersion setup at each vertex of the actual Cylinder. The result looks exactly as I wanted - but the technical aspect of things was a little messy as I now had to deal with many many more small-individual meshes that each had to be laid out on the UV if I wanted them to be unique.Additionally the riveting on the barrel was achieved with booleans, which I decimated as far as I could maintain the silhouette, but beyond that the retopology process of it was extremely trying, and is actually where about 1/5 of the topology comes from in the final model.


All-in-all I'm quite happy how the final product turned out! It definitely came with it's problems, but it came together at the end.The final specs are as follows:125,000 points (I'm currently going back to retopologize this, most of the points are the heat-sinks and I'll be changing that post-haste)three 1k textures (combined diffuse, roughness, normal)
Projects - Enoch
Personal Project
2024
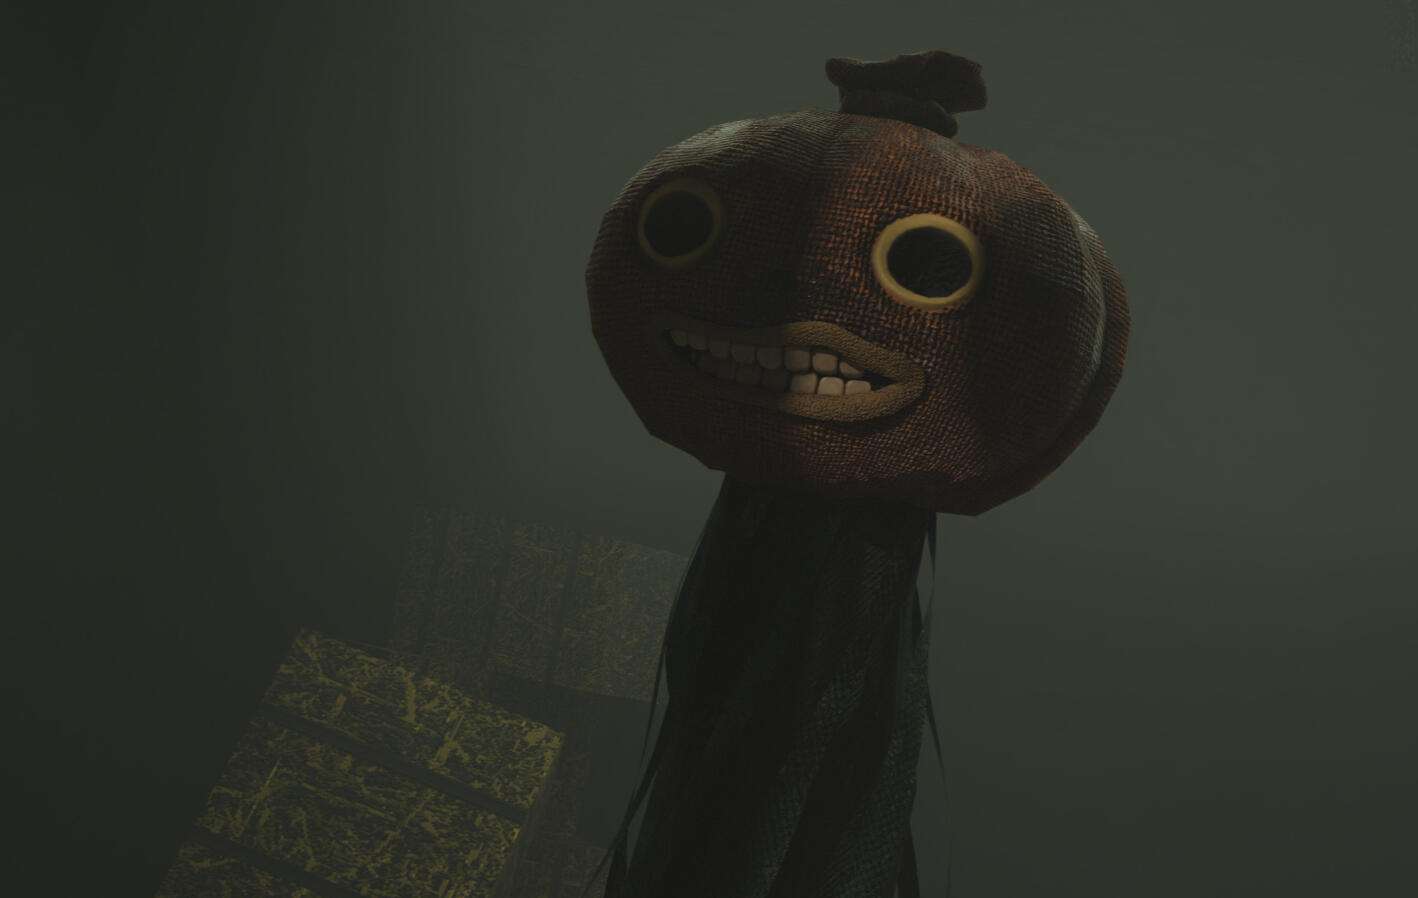
A new 3-Dimensional take on the false antagonist from the lovely series Over The Garden Wall.
Sculpted in Zbrush, retopologized and UV'd in Blender, textured in Substance Painter, and rendered in Blender.Enoch was the product of a month long October art challenge. Over the course of which, spanning roughly 12 hours of work, the intention was to create something that had it's roots (and most all reference and source material) based in 2 dimensions, and had strong shape language, but ambiguous and unique use of form.I had three separate goals that I wanted to stick to throughout the course of the development:1. Achieve and maintain likeness to the 2 dimensional source material, weaving in my own twists.2. Explore the use of Physics-based brushes and tools in Zbrush and Blender.3. Exercise speed and efficiency.
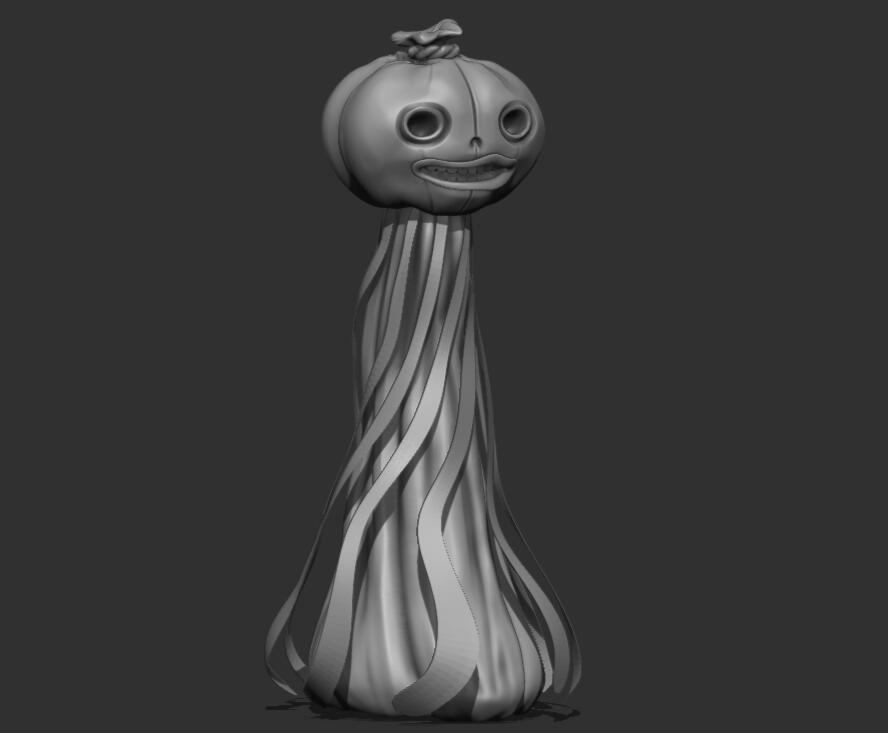
I began in Zbrush, working on developing the primary forms. One of the main problems I ran into was maintaining the fidelity between the 'body' and the 'head' of Enoch. The fact that he's so top heavy in the first place means that the varied lengths I (first) attempted for the body all looked strange. I inevitably settled on a more realistic approach, though looking back I honestly think I should have aimed for something a little thinner, pushing forward emphasis on the head, as opposed to the rest of the body.It's here that I can check off intention #2, as through some deliberation with Zbrush's cloth simulation brushes, I was able to achieve a really neat taught cloth look at the top of the head where it's all tied together.Also, I do think that I can check off intention #1, the likeness is definitely there!


After sculpting I took the model into Blender and began the retopology process (and minor additions of the haybales that would pretty much remain unchanged throughout the asset's development).The UV shells I think actually came out pretty decent, the tendrils that come out of Enoch's body I would have liked to straighten, but I ran into many issues with texture warping all throughout that seemed more like a headache for something so fickle as 'pretty UVs'.
I initially had every mesh under the same material (this was stupid) hence why they're all on the same UV sheet. If I were to do this again I would ABSOLUTELY use separate materials from the start.Either way, the wireframe came out looking pretty good!Post-baking, UV'd, Textured, and back in Blender, Enoch lives!I was initially pretty worried with maintaining the silhouette while still sticking to a decent polycount, which in this case sat pretty around...Exactly 5,000 points!(that's half credit for intention #3)
The final turnaround!Having clocked just about 12 hours of work into Enoch, I think I can tick off my other half of intention #3!Having had some time to reflect, here's a retrospective:Enoch came out looking pretty good! The silhouette is strong and really conveys what I was going for: he's unnerving, true to model, and pretty darn close to the source material!The tendrils look fine, but not as good as I'd liked - I would like to do more research on how I could convey the ribbon that they appear to be made of in the show, and how I could convey that they're being pulled or in motion around him.I should have used multiple UV sheets for the different materials I ended up using - it's definitely the next thing I look to change when I revisit this.
Projects - GRIMWAR
PRoducer | 3D Artist | Composer | SFX Designer
2024-2025
My Contributions
About GRIMWAR
GRIMWAR is a fast-paced mobility shooter slotted for a May 2025 release date Where:THE ARCHMAGE IS DEAD.
THE GRIMWAR IS FREE.
MANA IS FLEETING.
Project Details
GRIMWAR is a capstone project for senior year UCF Game Design Bachelors students, and is currently in development with a team of 13 people.GRIMWAR is being developed in Unity.On GRIMWAR, I served as the Producer, 3D Artist, Composer, and SFX Designer.
Overview
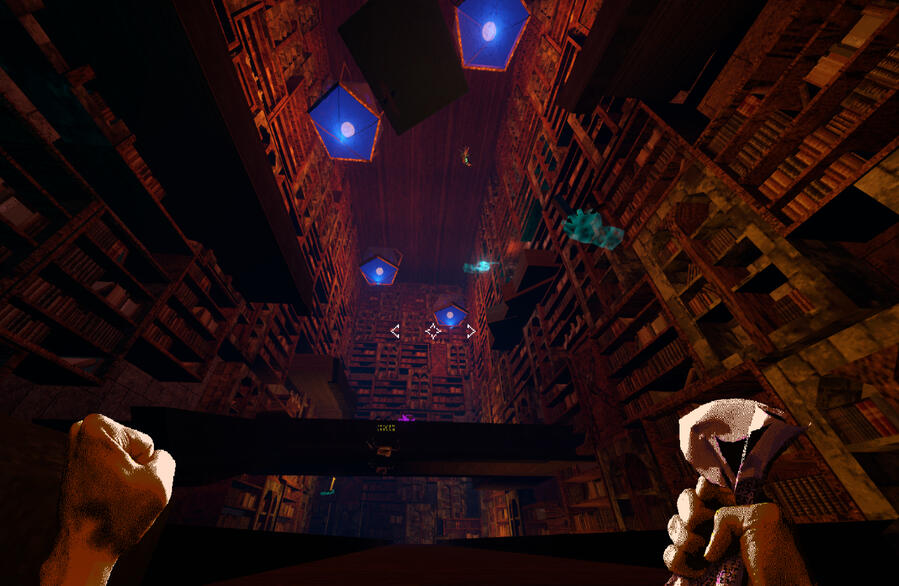
Channel swift reflexes and spell-slinging to sprint, wall-run, slide, evoke, and destroy in a magic infused tower; dominating enemies and casting spells at every junction, leap, and turn.
GRIMWAR - Production
My primary role through the development of GRIMWAR has been that of Producer - as such I've overseen...
Production of Deliverables
Creation of numerous different scope assessment documents, such as a game design document, art style guide, product backlogs, risk assessments, and team contracts. I additionally created deliverable time keeping assets, like a gantt and burndown chart, as well as weekly TMCC.
Scrum-Master
Through the development of GRIMWAR I also planned for and ran Agile-based weekly meetings for interdisciplinary teams, serving as the SCRUM-Master.
Playtesting Coordination
Furthermore, I kept track of numerous changes to be displayed to play-testers in the form of a changelog located in a playtesting discord server, to which I posted up-to-date information and notified playtesters of new builds.
GRIMWAR - 3D Art
As well as producer, I created 3D assets for GRIMWAR.
My main production software was Blender, occasionally using Substance painter.
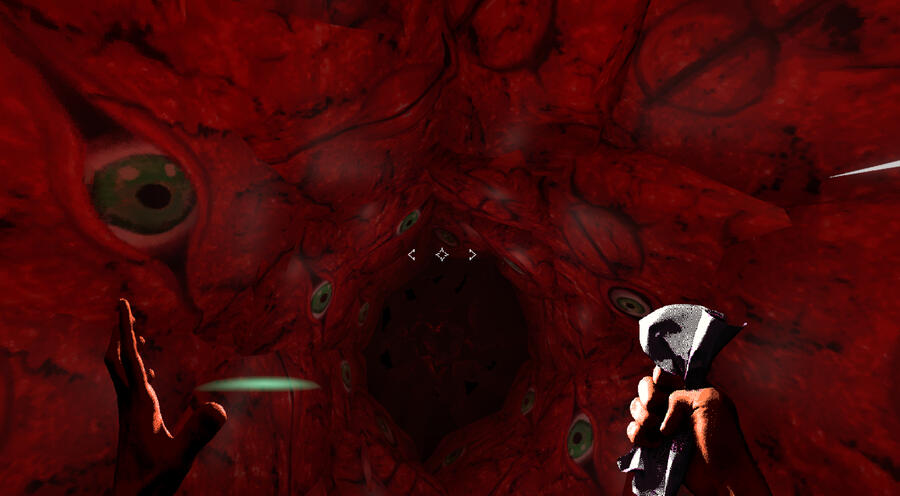
The Heart
The Final boss of GRIMWAR.

The Grimlock
Right hand of the GRIMWAR, twisted summoner.
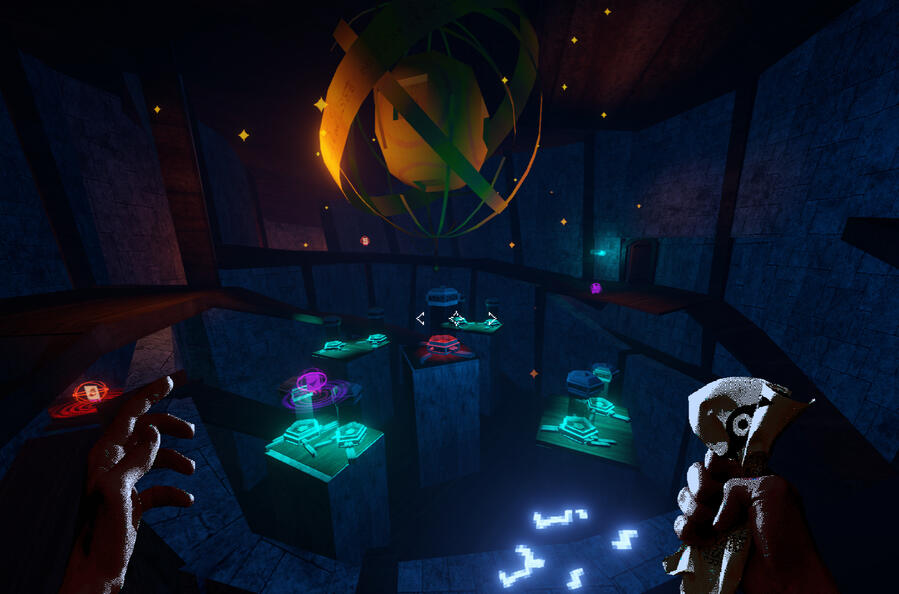
Hand Platforms
Facsimilie made to mock the player

GRIMWAR - 3D Art - Heart
The Heart
The Final boss for GRIMWAR, we wanted the heart to break as many rules as possible as laid forward by the art style guide as possible. A sphere in a world of cubes - it sits at 1170 faces, and is the largest asset in GRIMWAR by far. I was responsible for the creation of the heart, rig, and all animations.
Process
I mainly worked off of the concept art set forward by Alex Quay, going for big shapes and working my way through a stylistic approach to the human heart that errs on some amount of realism (basically not just a cartoon heart).Getting the general shapes done was fairly simple, and in blender I would use a subdivision modifier to smooth up any of the geometry I was working with on the heart proper. As for the tendrils that come from the ceiling, I would utilize curves and give them varying thicknesses to grant them different looks and to break up the shape more accurately.
Process Contd.
The GRIMWAR's modeling didn't take too long, but I knew I had the hand idea locked in, so I wanted to see how I could do it more efficiently than having to rig 8-12 separate hands and animate them one after another. I tried numerous different approaches, like rigging a single hand, animating that one particular hand, and then duplicating it; but with how I was doing the rig for it, inverse kinematics didn't play too nicely. However, the simplest approach down the line was actually just to animate each of the hands as apart of one huge rig with all of the hands, GRIMWAR, heart, and tendrils all on the same rig.
More processes and animations can be found on my Artstation, here
Projects - Skull Hologram
Winning Submission for the Art For Games July 2025 Game Art Competition
2025
For the month of July, the possible themes that were given were: Bone, Crystal, Holographic, and Fire - with the winning theme being selected being Bone.I had taken it upon myself to make an attempt at combining two themes, as I'd done in the past with similar challenges, and in this case, I thought it fun to try and create something more sci-fi and rugged.
Polycount
1,724 Faces
1,680 VerticesThough the shader wasn't made at this point in time, I knew that it would obfuscate a lot of the fine details, so I mainly focused on defining key features, silhouette clarity, and making sure that the topology could speak out a lot more in the final product.

Shader First Approach
My first approach with the shader is depicted on the left. I had scanning CRT lines rising vertically with some minor vertex wobble, masked by a fresnel shader. You can see the shader graph depicted below.The goal was to create something that appeared alive, and I think I succeeded in that - but the problem came about was that it didn't appear 'glitchy' enough for my taste.

Shader Final Approach
For a second, and final approach, I knew I wanted the projection to feel weird or different in some way.I found that through mapping a texture based on screen position vs local or world position lead to an effect that's almost uncanny, and lends itself to that sci-fi approach that I wanted in the first place.Furthermore, I cranked the size of the displaced noise that was going over the vertices by a lot, as well as the displacement amount. This created a flickering effect that I was VERY happy with.Its shader graph is positioned below.

Final Words
And, in truth, that was it!
I'm very happy with how it came out, though I wish I spent a little bit more time on the mesh for the base, as it's very simple, and not quite what I wanted when I thought of this idea initially.
GRIMWAR - 3D Art - Grimlock
The Grimlock
The Grimlock is the final enemy that the player encounters throughout their descent through the Archmage's tower. By teleporting, summoning other enemies, and firing homing fireballs at the player, it's the GRIMWAR's final chance to lengthen its reign.
Idle
The Grimlock is a floating / flying enemy that tries its best to keep distance from the player. As such I tried to maintain that floaty nature in both its appearance (the skirt it wears, abiding by drag and its own weight).I additionally tried to make note of its unstable and unpredictable nature, adding some noise and jitter to the head movement to make it seem like its not quite all there.
Fire and Channel (Summon)
Being unable to work with arms, I had to be creative as to how I showed what the Grimlock was doing at any given time, using the rest of its body to best convey what I wanted to.I began mainly by setting up the larger key frames (The flare of the skirt on the fire animation, and the final 'burst' point of the channel animation), and then working my way down to smaller and smaller movements.
Initial concepts, textures, and color editing


Details
The final model for the Grimlock is 304 faces, and utilizes 1 756*756 texture sheet for each material - bones, metal, and cloth.The Grimlock was made in Blender, and textured in Substance Painter
GRIMWAR - 3D Art - Hands
Hands
Hands hold a lot of metaphorical meaning throughout GRIMWAR, being the only thing the player sees regarding the main character throughout most of the game. It makes the player feel unique and different, as it's what sets them apart from the different experiments they encounter while making their way down the tower. That is, aside from these hands - what the player encounters in the final level.


Pictured above are a few renders of what the hand could have looked like in GRIMWAR initially. This iteration has more topology to prevent candy-wrapping, as well as provide some volume to the masses around the knuckles and rest of the hand.I got to rigging and animating.
Rigging
The hands use a pretty simple rig, with each fingertip boasting an IK joint to the base of the finger, and the bones of each finger with a copy rotation constraint for performing finger curl.
Topology Concerns
In the hand iteration listed above, the hands sit at 390 polygons. To most metrics, this is already far lower than what would be necessary in any other game. However, GRIMWAR's style mandates that the non-hero models be kept just at, or under ~300 polygons to maintain an overall visual consistency.My main contributions that lead to the previous model going over budget were cuts that resulted in extra topology to reduce reduction of volume through pinching when animated - however, through the usecase, the player would never actually witness any of the pinching as
1. The animations would be fast enough to where it wouldn't be noticeable while the animation played2. The pinching would occur in places that the player wouldn't be or see, like the back of the hand.We actually had a smaller, less topologically dense hand that was already made for production of the game - it was just a matter of projecting the animations to the lower-polygon model. I made a few changes to the animations (so it would be more suited for less polygons available)Below is the result:
Looking Back
Looking at the animations - it's obvious that while there are some unfortunate instances of candy-wrapping and volume reduction that come with the lower topology - as I stated before, the usecase honestly doesn't care much about these.The static (resting) forms of each of these poses is strong enough from the angle the player will see them on their ownThe animations are quick enough to where these animation errors are hiddenAll in all, while I would have liked to have used the hands with the original animations I worked on - I think these came out quite well!Below are what the hand looks like with textures applied - textures are done via texture atlas for the near-entirety of the Core to minimize material use.

Texturing Methodology
Using a texture atlas wasn't too difficult, and most other assets that I developed for GRIMWAR followed a similar workflow.We wanted to show what parts of the hand the player should be prioritizing, using the flesh texture alongside the stone texture - we tried to make it appear as wall-like as possible to stress that it was actually something they could interact with.
GRIMWAR - Sounds and FX
For GRIMWAR I was in charge of creating compositions for each level, menu and screen - as well as creating SFX for each entity on screen at any given time.For Compositions throughout GRIMWAR, I wanted to convey speed - as well as trying my best to coax the listener into a flow state as much as possible. For this, I gravitated towards Jungle, or Drum and Bass as a starting point regarding the genre. Large chopped up pads with chaotic drums in the back let the player zen out and let their hands take over while they begin thinking critically about other aspects of the game. The compositions don't take a back seat, but sit nicely in the passenger seat - coaxing the player to keep moving forward, and trying to get a better time on each level.
About Me


Greetings!
I'm Caden.
I'm a Programmer, 3D artist, producer, audio designer, and specializing in Game Design and Computer Science. Everything that I create should astound, inspire, and encourage users, players, or potential clients. I'm a student at University of Central Florida, pursuing a double major in both Computer Science with a focus in AI and Robot Vision, and Digital Media with a focus in Game Design. Equipped with a wide, and still growing skill set - my goal is to act as a sponge to best grasp and learn from the things that inspire myself, and others to look both in and outward.If you want to get in touch with me, take a look at the footer; my Resume, Artstation, Bluesky, LinkedIn, and Email are listed all down below.